SQL LocalDB to Azure
Recently I tried migrating a SQL Server LocalDB to Azure and found what I thought would be an easy job, to actually be a bit pf a pain.
I’m not saying this is the best way to get a LocalDB live on Azure but below is the easiest way I could find, if anyone knows a better way, please feel free to let me know.
Why LocalDB
Usually I wouldn’t choose to develop against a LocalDB database but I had started my site with a Visual Studio template MVC site and thats what it gave me.
Moving to Azure
Now this is what I thought would be the easy bit. My local prototpye had gone well, so lets get this bad boy live! LocalDB is just a mdf and a ldf file like any SQL database, so I didn’t foresee any issues.
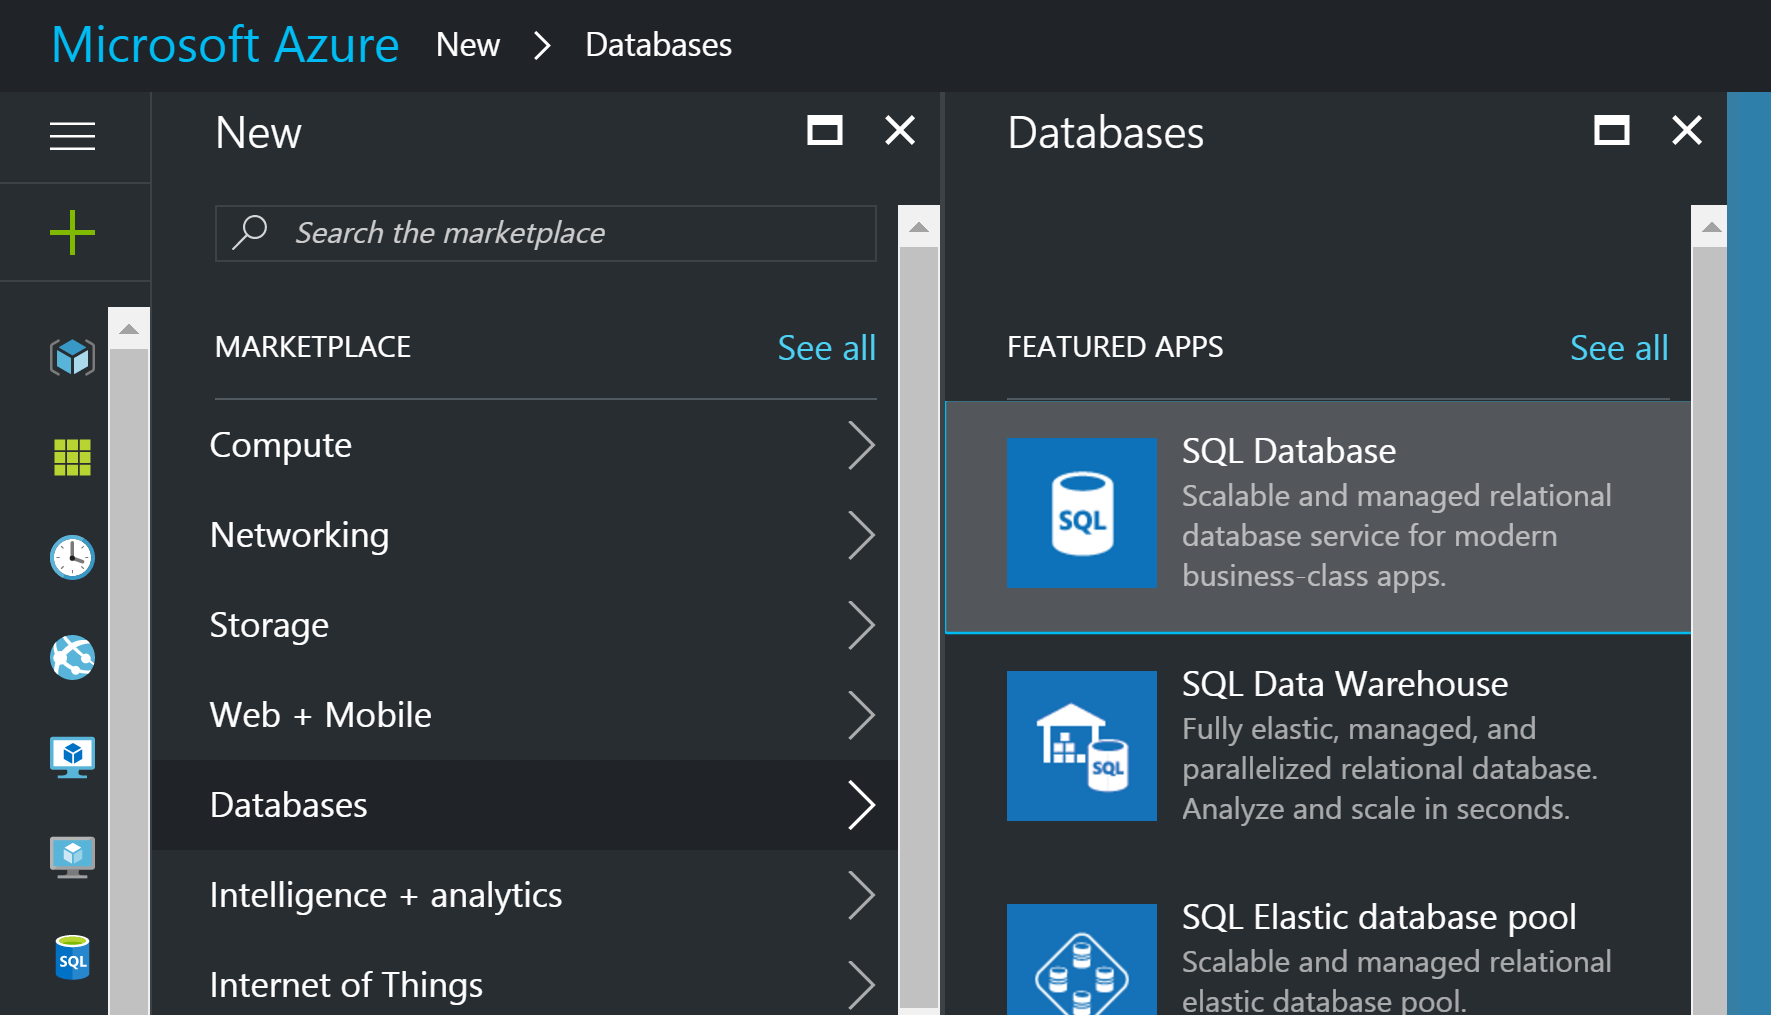
However, the only way I could find in Azure to upload an existing database was to use a .bacpac file.
SQL Server Management Studio
I couldn’t figure out a way of getting the .bacpac file directly from LocalDB or from within Visual Studio. The easiest way I could think of was to attach the mdf file to a local of instance of SQL Server. The fact that I didn’t have a local instance and had to set one up was a bit annoying.

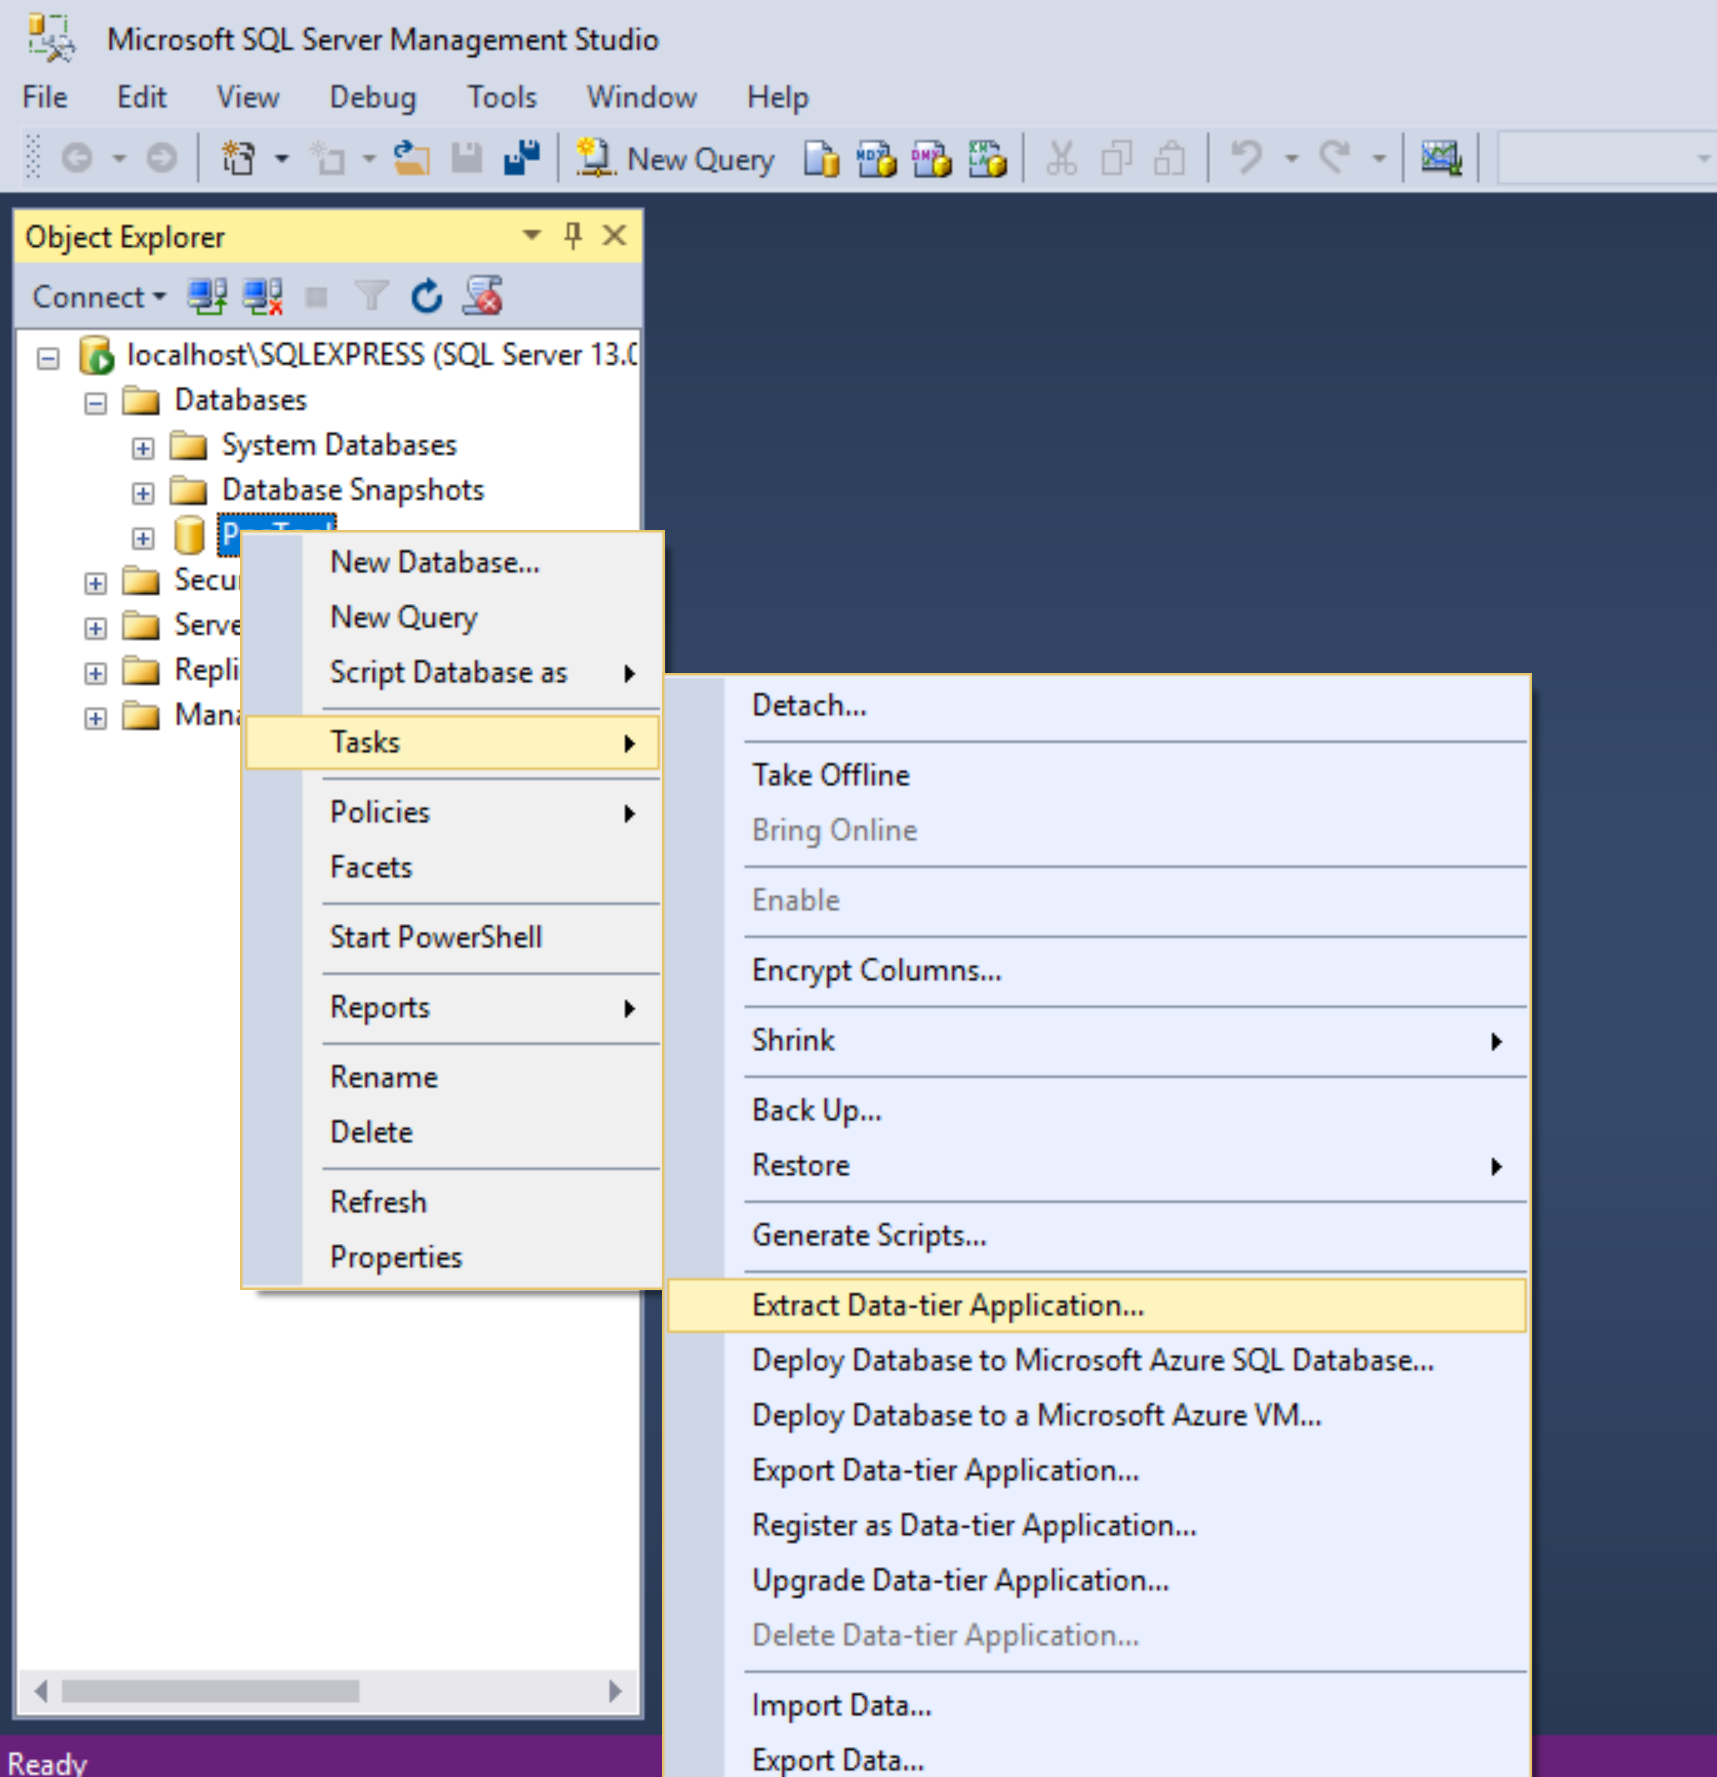
Export Data Tier Application
In order to get the .bacpac file, you need to select Export Data Tier from the Tasks menu of the database. You can select a local drive or upload the .bacpac directly to an Azure storage account. Bear in mind, that using this method you will need an storage account. Even if you store the .bacpac locally, you will need to upload to a storage account first in order to restore to an Azure SQL server.
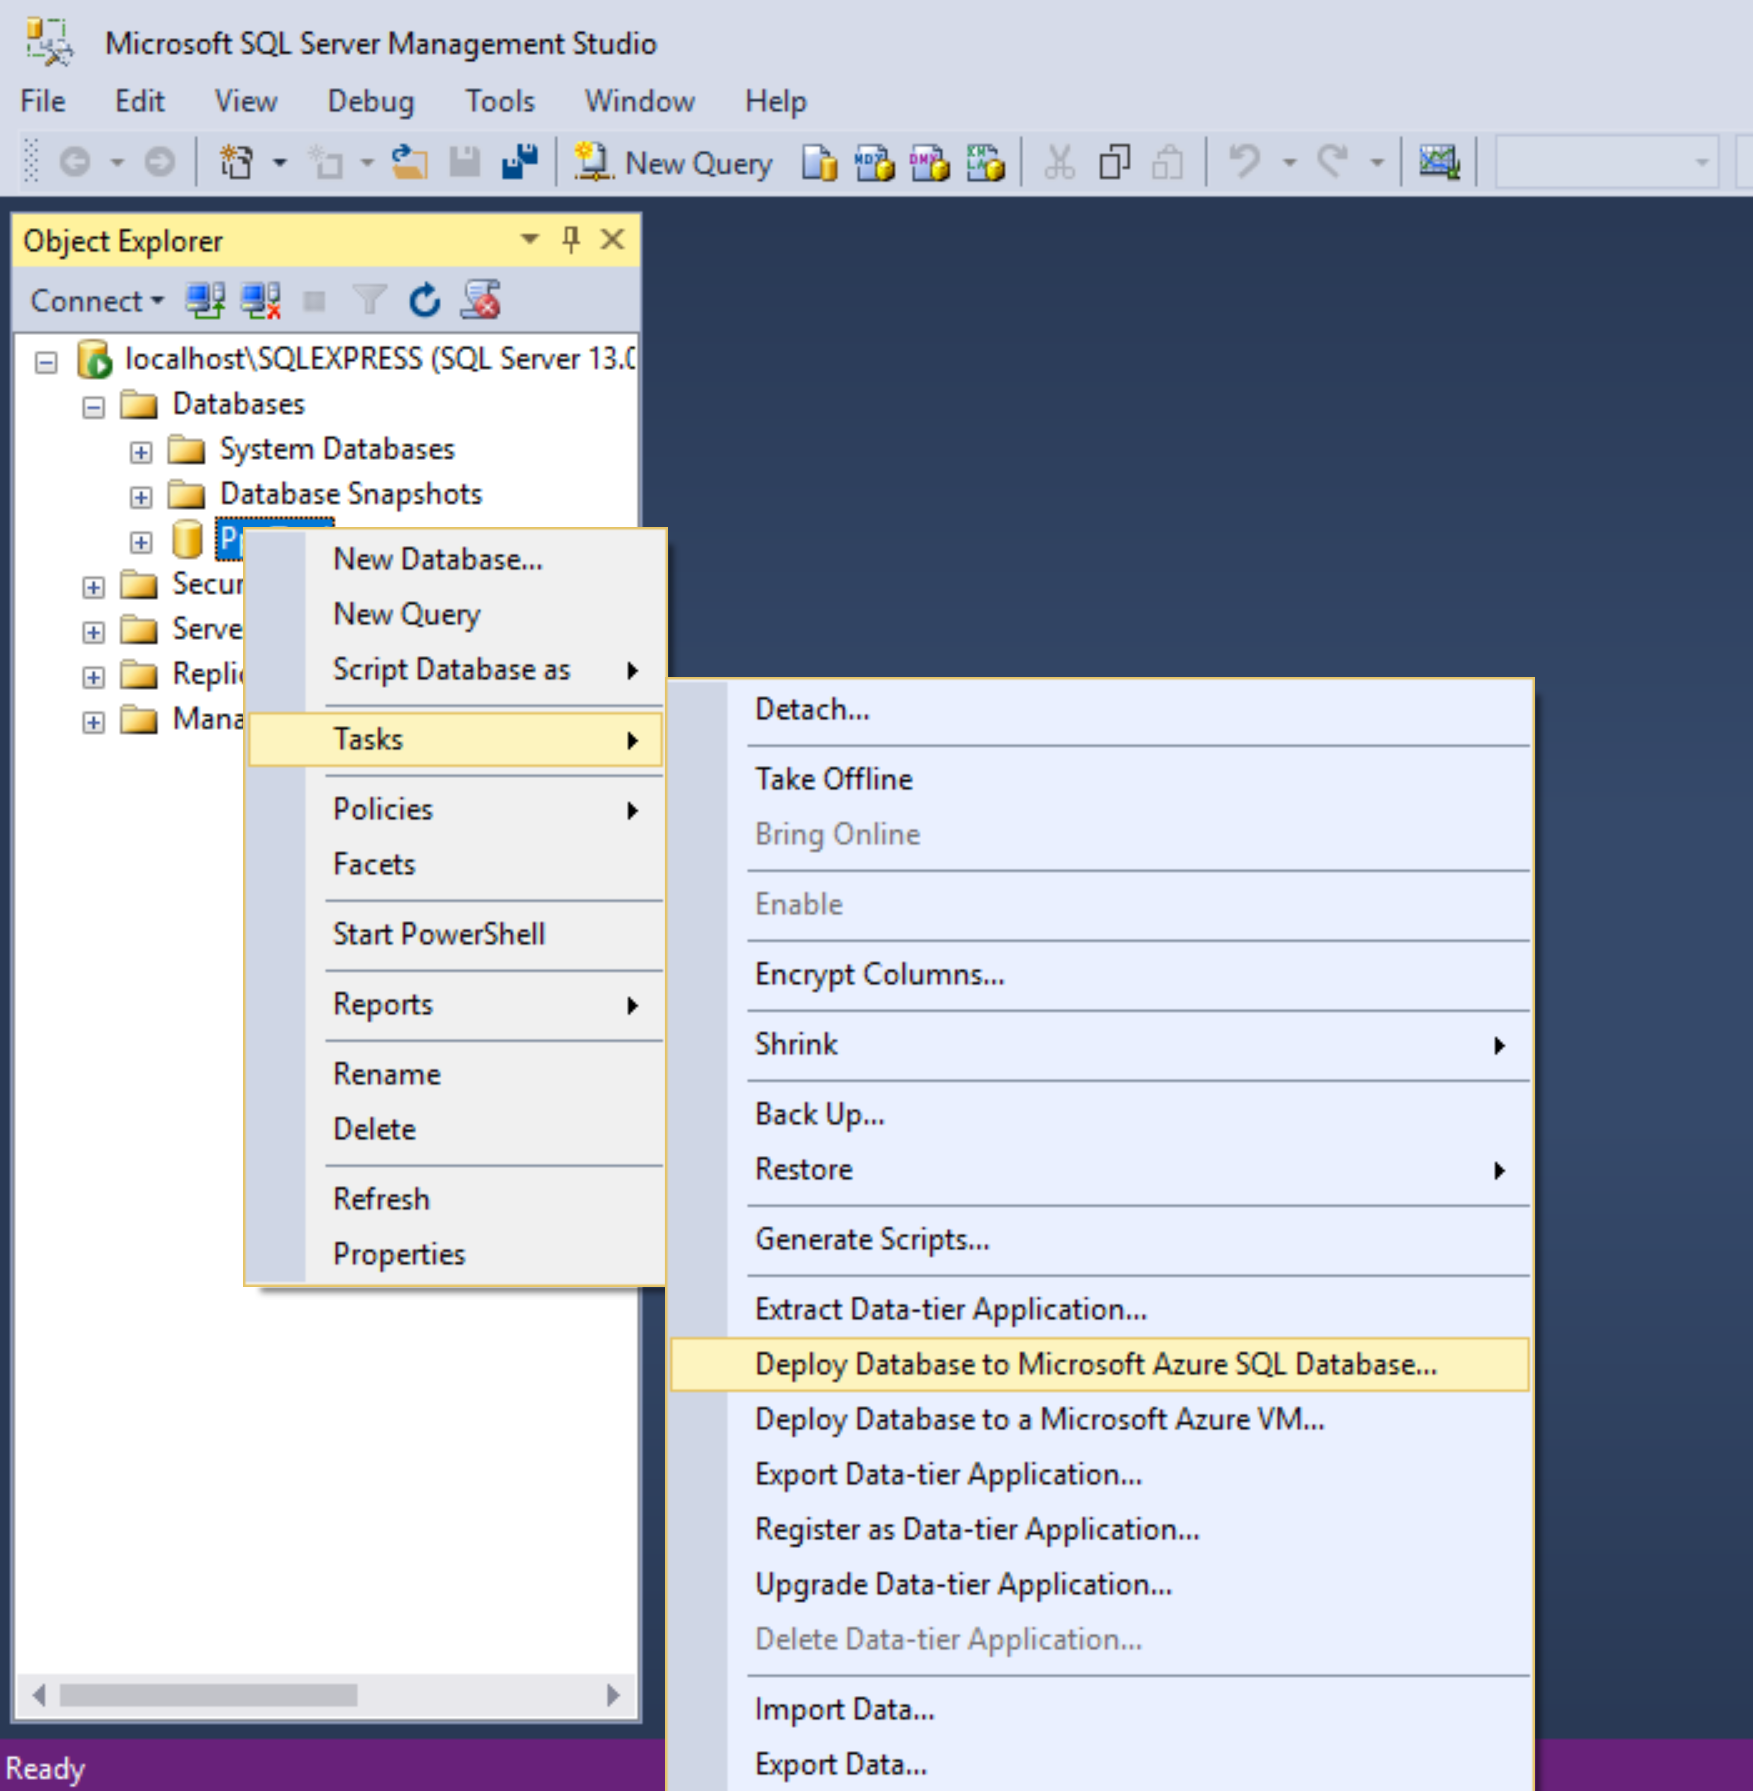
Deploy Database to Microsoft Azure SQL Database
The option I went for was Deploy Database to Microsoft SQL Database. With this method you do however need a connection string to an existing Azure SQL server. In order to get this, I made a free small database using the Azure portal, which creates an Azure SQL server at the same time as the database.
With the connection string you can then import the database directly. Once the import is finished, then you can delete the first database.
Generate Scripts
Another option would be to use the Generate Scripts task. However, this would also require attaching the LocalDB to a local instance of SQL Server.
By default, gnerating the scripts of a database will only generate the scripts for the schema.
If you also want to deploy the data in your database, don’t forget to select “Schema and data” from the advanced scripting options in the Generate Scripts wizard.

I was surprised at how awkward it was to transfer a LocalDB from a local prototype to Azure. There are a few different options to getting it done, it really depends on what you currently have set up in Azure for which one will be easiest for you.
And these are just the ways that I found, if anyone has any easier/quicker methods it would be great to hear them.
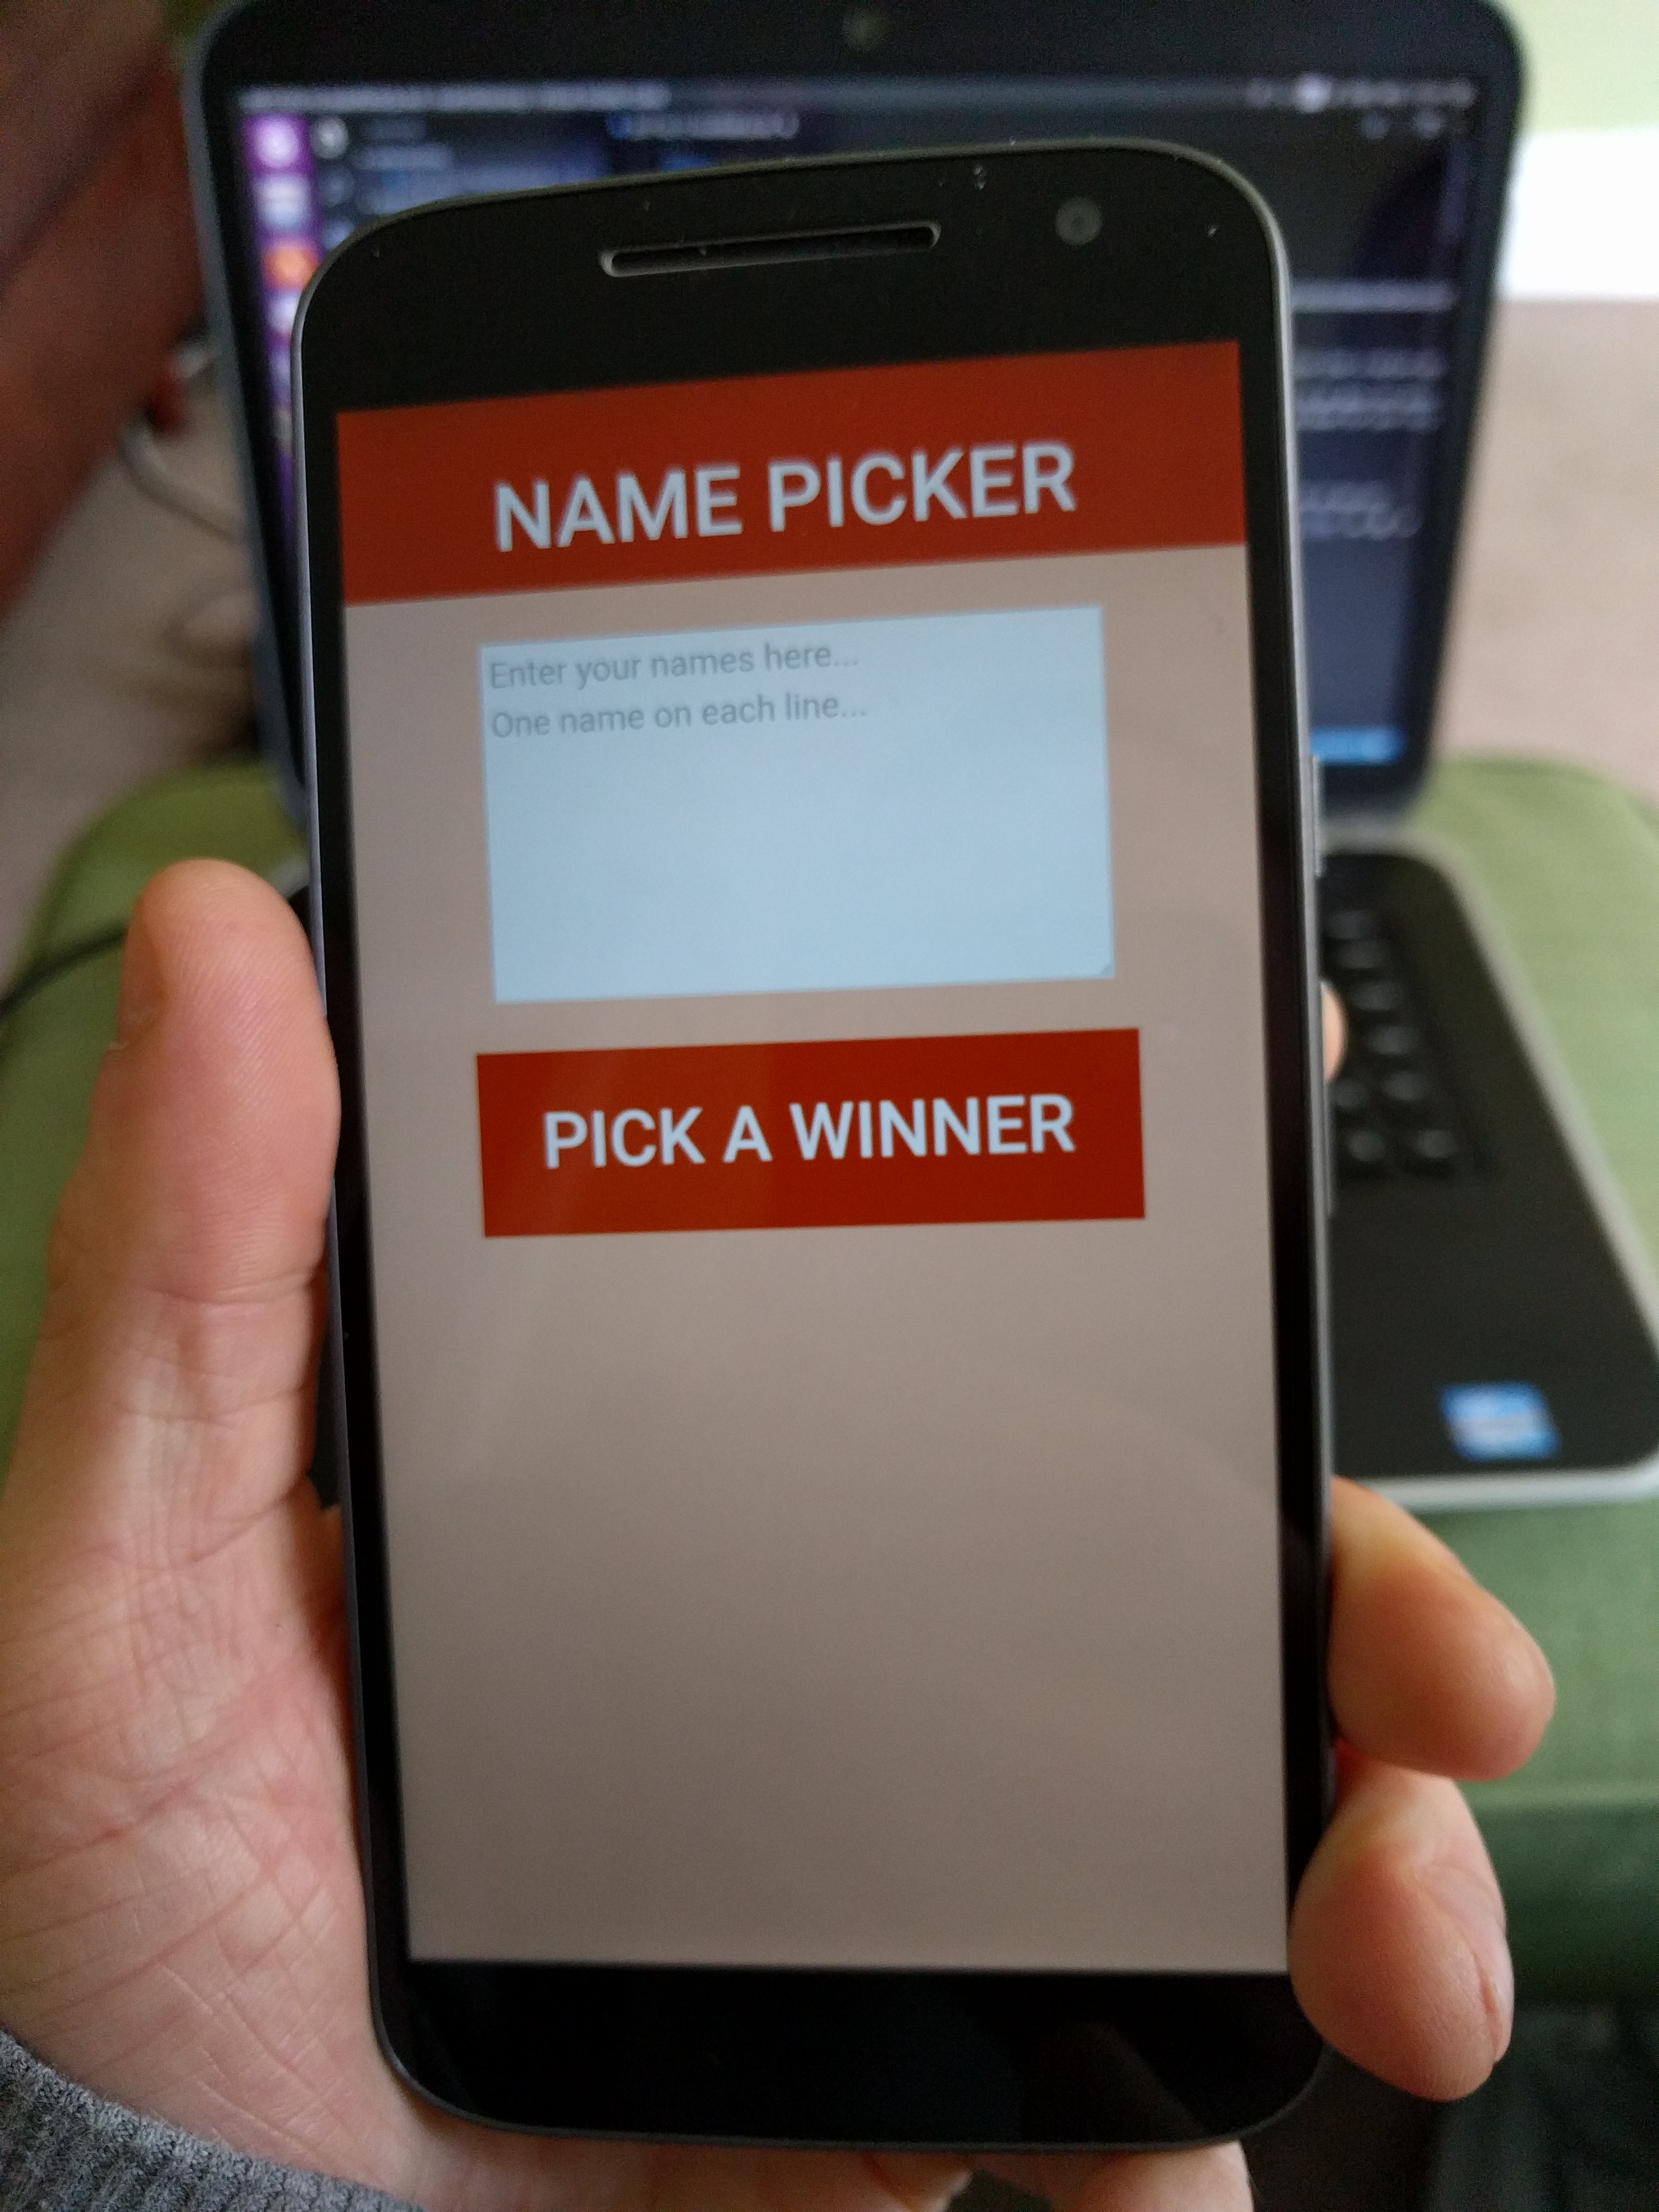
Manifold JS
I thought I’d give Manifold JS a try and create a hosted web app for Android. You can find my very first app in the Google Play store here
Manifold JS
Manifold JS is a node application that will package up a website like a native app.
You can get it from NPM or you can use the package generator from their site. I decided to go down the package generator route as it will create the W3C manifest and give you any warnings that you may have for your target device.
Android Asset Studio
I’m not a designer, so one thing I found massively useful in getting my website ready to be an app was Android Asset Studio. It’s a really quick and easy way to create the icons in the needed sizes for the Google Play store.
You can use an image if you have one or you can generate your icons just with text.
Android Studio
Once you have completed the package creation and download from Manifold JS there will be a Gradle file under the Android folder.
You’ll need to install the Java SDK and Android Studio. Using Android Studio an APK will need to be generated. Luckily you don’t really need to know how to use Android Studio (as I dont…yet).
Import the Gradle file, then under the build menu select Generate Signed APK. It has to be a signed APK in order to be uploaded to the Google Play Developer Console.

Google Play Developer Console
You can sign up to the Google Play Developer Console here.
After signing up, you need to upload the APK created in Android Studio. There are also some questions to fill out about the purpose of the app, along with providing screen shots for the store. With the form filled out, its time to publish! This can take a few hours but in the console you can check on its status.
Benefits of hosted web apps
The major benefit I found with this approach to getting an app in the store was the flexibility of being able to create a website in whatever language you like. The increased speed of getting a site ready and getting cross platform apps quickly is very helpful.
Drawback of a hosted web app
One drawback I found with creating a hosted web app is that the website needs to be performant. For this example project my site was hosted on a free Azure web app. This did work, but the free web apps switch off if they aren’t used. As such, the Android app can take a long time to start if no one has used it for a while.
ASP.Net Core Azure
I’m a big fan of Azure and the Web Apps especially. I know how easy it is to deploy an ASP.Net or Node app. I assumed that deploying an ASP.Net Core app would be as easy, turns out I was wrong.
There are a few steps to complete before the app will work in Azure.
But I got it working in the end, and here it is!
global.json
Firstly you need to set the SDK version in the global.json file, so your local version will match the one being used in Azure.
{
    "projects": [
        "src",
        "test"
    ],
    "sdk": {
        "version": "1.0.0-preview2-1-003177"
    }
}
You can get your local dotnet version by;
dotnet --version
Thanks to Scott Hanselman for getting me over the first hurdle.
Configuring your app to run in IIS
For your app to work in Azure, you need to configure it to work with IIS and there are a few steps to this. The detail on them can be found here
project.json
Microsoft.AspNetCore.Server.IISIntegration needs adding as a dependency in project.json.
There are a few additions needed to the file as well.
"tools": {
  "Microsoft.AspNetCore.Server.IISIntegration.Tools": "1.1.0-preview4-final"
}

"scripts": {
  "postpublish": "dotnet publish-iis --publish-folder %publish:OutputPath% --framework %publish:FullTargetFramework%"
}
Any files that will need to be deployed with your app, such as the now required web.config will need to go in the publishing options. The publishOptions docs are here
"publishOptions": {
    "include": ["wwwroot", "Views"],
    "includeFiles":["web.config"]
}
web.config
Now we are setting the app up to run in IIS we will need a web.config. This is my basic web.config, just the processPath dll will need to be updated;
<?xml version="1.0" encoding="utf-8"?>
<configuration>
  <system.webServer>
    <handlers>
      <add name="aspNetCore" path="*" verb="*" modules="AspNetCoreModule" resourceType="Unspecified" />
    </handlers>
    <aspNetCore processPath=".\Site.dll" arguments="" forwardWindowsAuthToken="false" stdoutLogEnabled="true" stdoutLogFile="\\?\%home%\LogFiles\stdout" />
  </system.webServer>
</configuration>
WebHostBuilder
In the webHostBuilder in Program.cs you need to call .UseIISIntegration()
var host = new WebHostBuilder()
    .UseKestrel()
    .UseContentRoot(Directory.GetCurrentDirectory())
    .UseIISIntegration()
    .UseStartup<Startup>()
    .Build();
Troubleshooting Azure
There was a lot of hair pulling to get this up and running, but on the bright side it was good practice trouble shooting Azure.
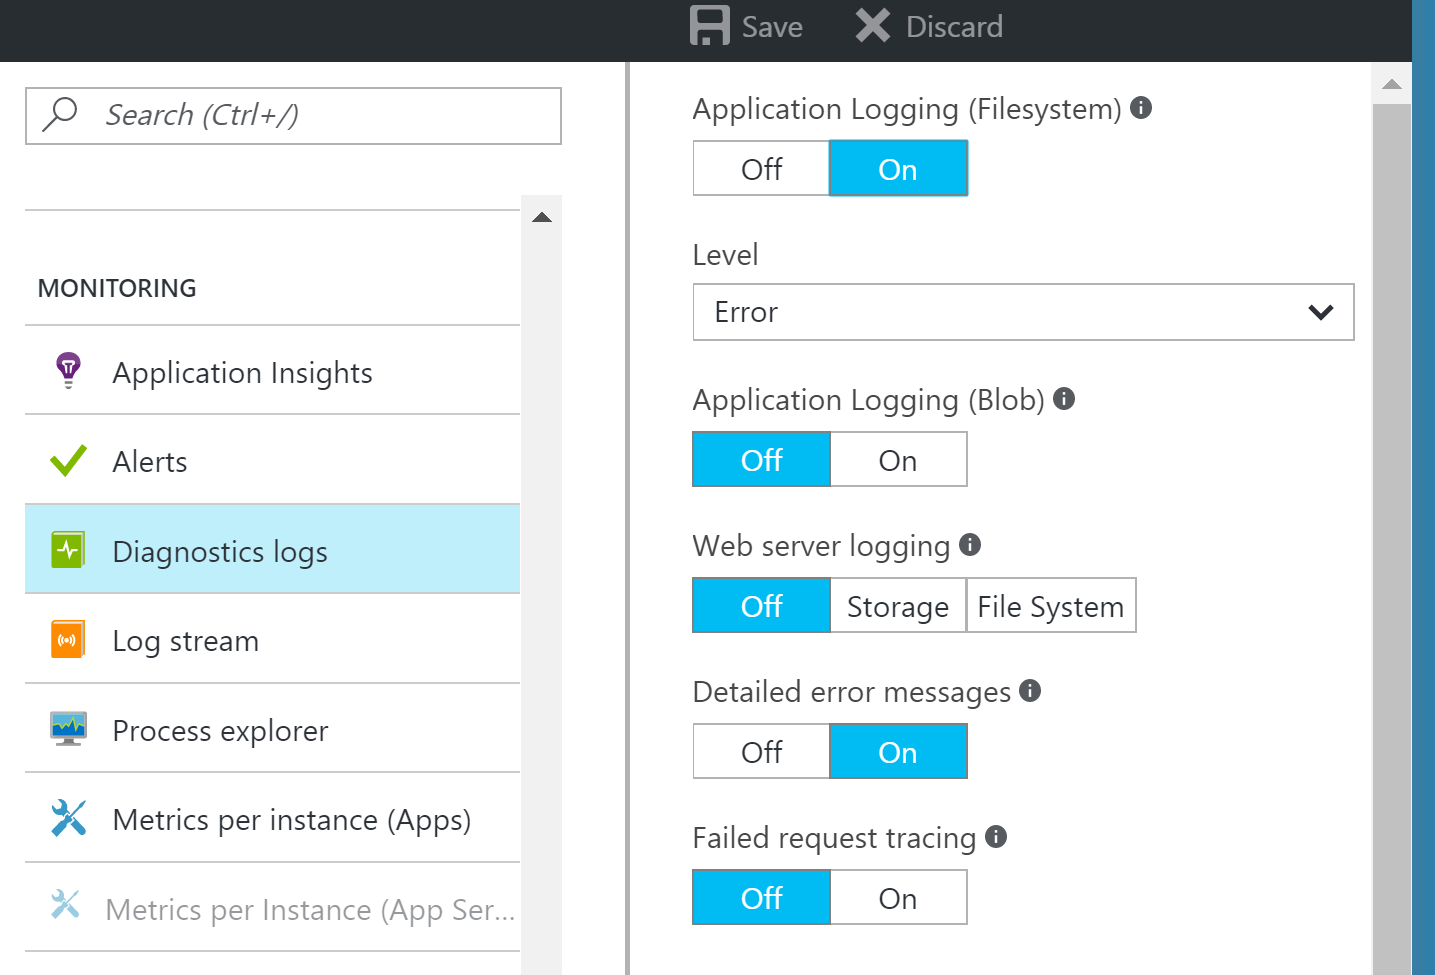
Logging
To turn on logging in Azure, go to Diagnostic Logs and turn on Application Logging and Failed request tracing.
Kudu
Kudu has some very useful tools for an Azure web app. To reach Kudu, go to {your app name}.scm.azurewebsites.net
One of the things I find very useful in Kudu is the Process explorer. It shows which process are running on your instance.
Another useful tool is Debug Console. From here you can explore the files that have been deployed for your app, but also any logs. You can also access the command line, very helpful in investigating any issues.
And if all else fails, under Tools you have the Diagnostic dump. This downloads all your logs in one zip file.
Introduction to Javascript Unit Testing
I’ve decided to learn how unit testing can work in Javascript in order to start writing Javascript I trust. Here is my mocha example
Mocha
I decided to go with Mocha as my test framework as it seems pretty popular and I’ve heard good things about it.
Good old npm made it easy to setup as usual.
npm install mocha --save-dev
I decided not to bring in any assertion libraries such as Chai as it was a small project, relying on node’s assert library seemed adequate.
If any of my tests get more complicated I may look at other assertion libraries, but so far I feel that if a test needs a complicated assertion then the test itself is likely to be testing more that one thing.
Pending tests
One of the fetures of mocha that I was really impressed with was the ability to have pending tests.
If you call the “it” function with only a decsription, in the results the test will be show up as pending. This feature could be really useful to get all the requirements down first and work through them as a check list.
done()
If you have any asynchronous code that has a callback you’ll need to use the done method. Mocha passes the done parameter to each test, it can then be called from the callback function.
Without done, any tests that have asynchronous code will always return positive as the assertion will not have been called. This is one thing I didn’t like about mocha, for me, if a test has no assertion it should return negative.
describe('service(param, callback)', function () {
    it('should square the first param', function (done) {
        var param = 3;
        var expectedResult = 9;
        callbackExample.service(param, function (err, data) {
            assert.equal(data, expectedResult);
            done();
        });
    });
});
npm scripts
To run the tests easily I put the command in to the package.json, using the local install of mocha.
"scripts": {
  "test": "node ./node_modules/mocha/bin/mocha"
},
Refactoring
As with any unit tests, having mocha tests in place has made refactoring a lot easier.
When making applications in node, my code is much easier to break down in to small, testable modules. I find its a good rule of thumb that if code is difficult to test, it’s probably not designed very well.
What is a unit of work?
Recently I’ve been looking at how a unit of work should be tested and asking myself the question “should every class have it’s own unit test?”
A test per class?
A lot of my unit testing historically has been around making sure every class is individually tested. Every dependecy in the class would be mocked so I could focus the test on the class itself.
However, I’ve been experimenting with testing a full unit of work rather than just each class itself. In some cases this might be a single class but only if the class covers a unit of work.
The boundaries
For my dependecies I now create a new instance of each so in effect I am still testing each class, just not individually.
These aren’t integration tests though. The boundaries will still be mocked out. The boundaries may be external, such as a database or an api, or they may be internal still, such as the layers of the application.
Refactoring
By focusing on the tests on what the code is trying to achieve and not the implementation I have found it much easier to refactor.
If a class or method is becoming too bulky and needs to be abstracted in to a new class for example, the test will still cover this new class while still ensuring the desired outcome is still happening.
With not having to keep in my head how all these little classes will fit together to perform the pice of work, my confidence in wanting to refactor has grown. When each little class is just tested individually, with no tests to ensure they are are fitting together I find I can be reluctant to start changing the design of the system.
Reveal intent
The increased scope of my unit tests from class to unit of work has helped not only my code, but helped my tests to follow one of Kent Beck’s 4 simple design rules;
Reveals intention
I’ve always taken care when naming tests, but now my names tend to be more useful. They have moved from names such as;
[Test]
public void GivenValueIsX_DependencyBIsCalled()
{
  //testing the individual class goes here
}
To something more like;
[Test]
public void GivenAFormPost_TheCorrectDataIsCalculatedThenStored()
{
  //here a call will be made to the controller
  //new up the required services rather than mock them
  //only the external call to the database would be mocked
}
Again, I’m finding this means I have to keep less of the systems reasoning in my head. I don’t have to remember why its important a certain service is called. The test will tell me why something is happening and test the result. It doesn’t care how I get there.
So should every class have its own unit test?
No.
Unless there is a good reason, such as external dependencies, each class should be covered by tests but not necessarily their own.